
Vue生命周期和钩子函数
字数统计:1.1k字目录
Vue生命周期和钩子函数
1 | beforeCreate |
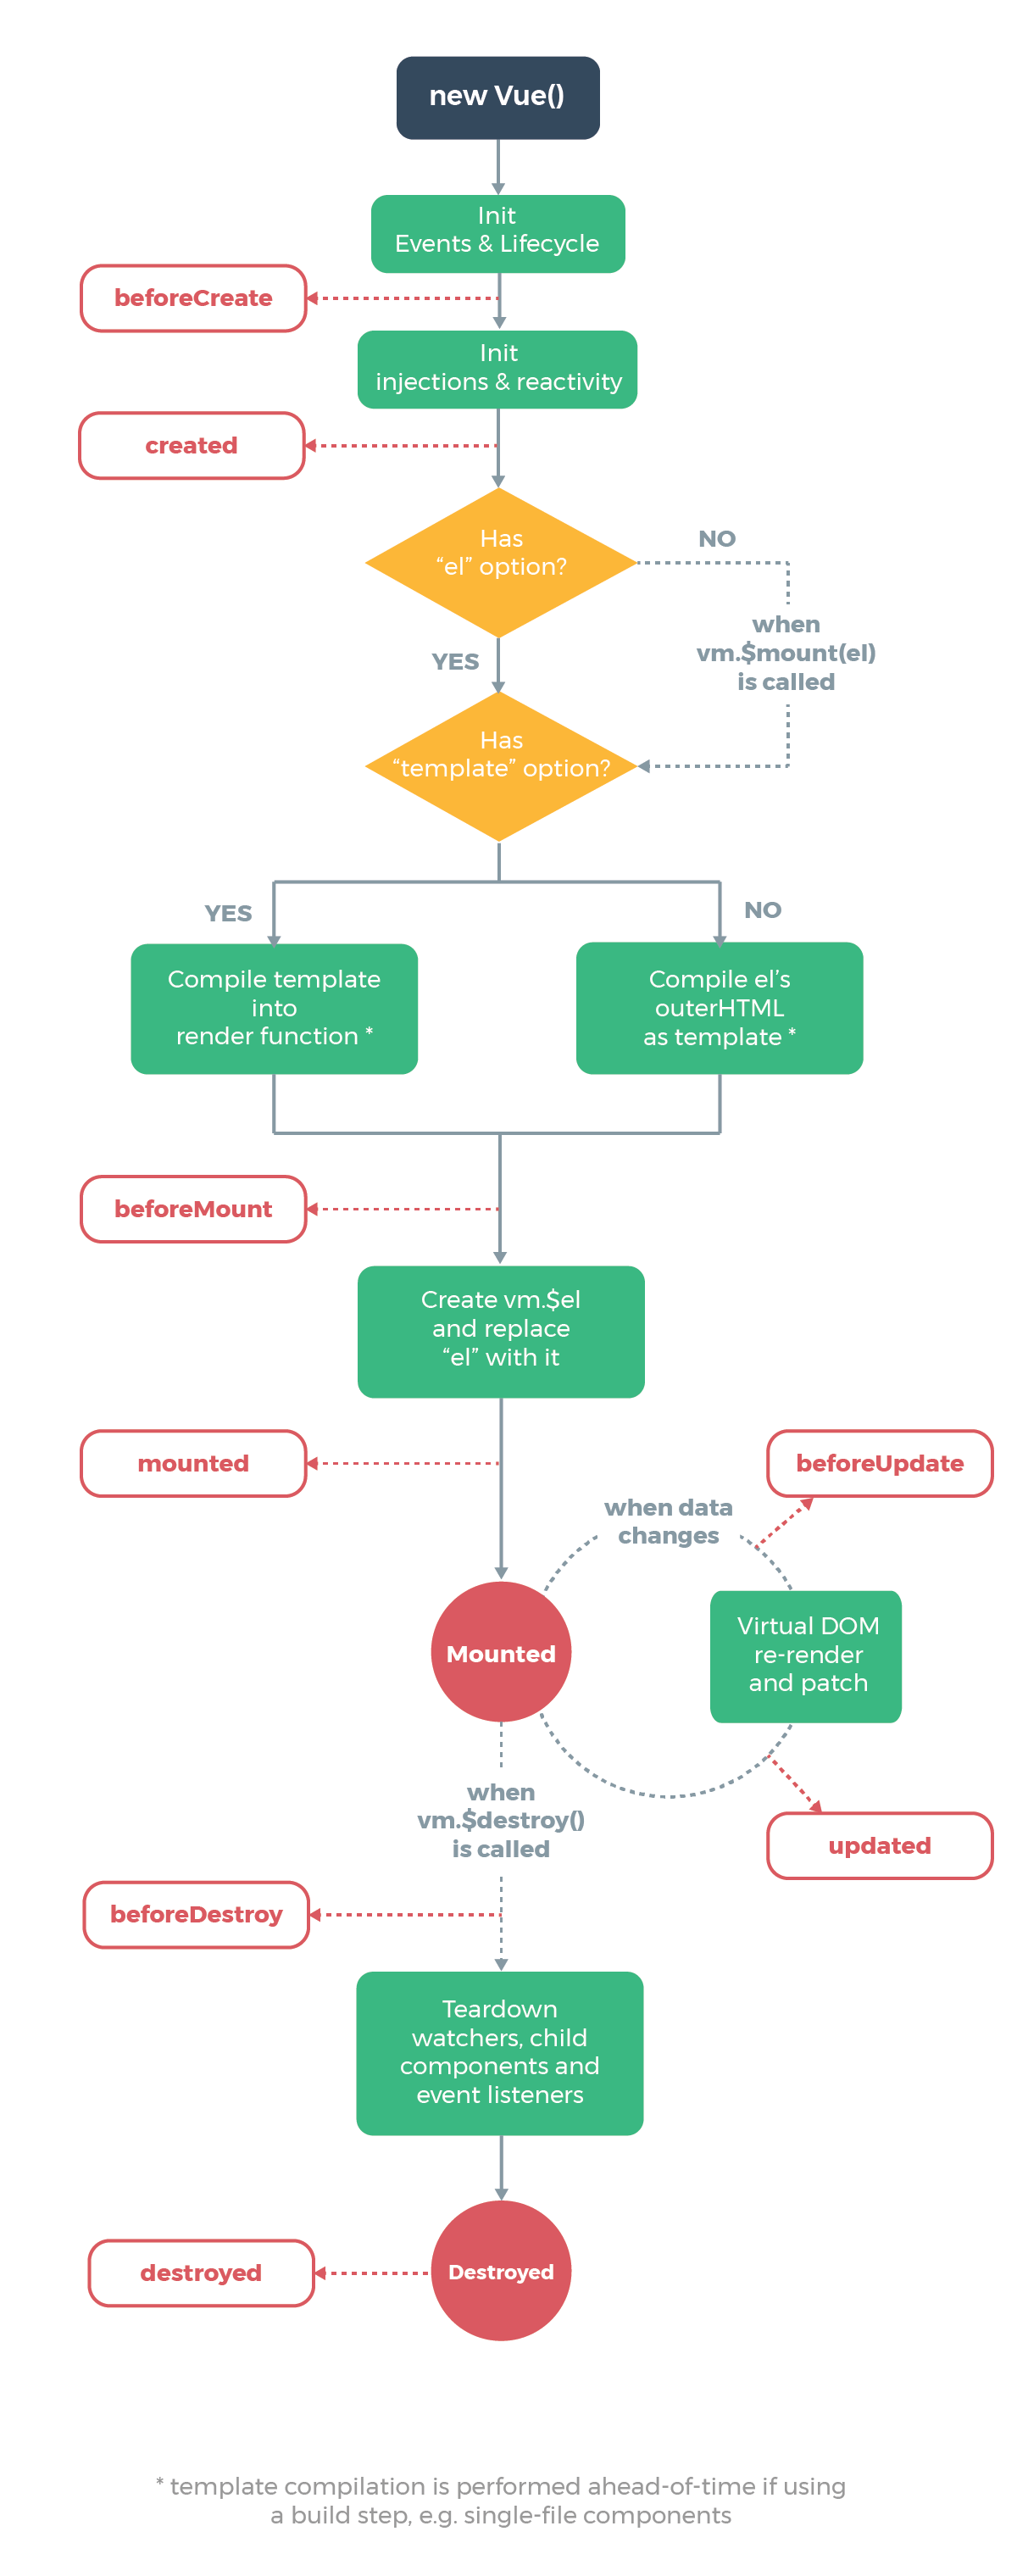
创建前/后: 在 beforeCreate 阶段,vue 实例的挂载元素 el 还没有。
载入前/后:在 beforeMount 阶段,vue 实例的$el 和 data 都初始化了,但还是挂载之前为虚拟的 dom 节点,data.message 还未替换。在 mounted 阶段,vue 实例挂载完成,data.message 成功渲染。
更新前/后:当 data 变化时,会触发 beforeUpdate 和 updated 方法。
销毁前/后:在执行 destroy 方法后,对 data 的改变不会再触发周期函数,说明此时vue实例已经解除了事件监听以及和 dom 的绑定,但是 dom 结构依然存在
生命周期探究
对于执行顺序和什么时候执行,看上面两个图基本有个了解了。下面我们将结合代码去看看钩子函数的执行。1
2
3
4
5
6
7
8
9
10
11
12
13
14
15
16
17
18
19
20
21
22
23
24
25
26
27
28
29
30
31
32
33
34
35
36
37
38
39
40
41
42
43
44
45
46
47
48
49
50
51
52
53
54
55
56
57
58
59
60
61
62
63
64
65
66
67
68
69
70
71
72
73
74
75
76
77
78
79
80
81
82
83
84
85
86
87
88
89
90<!DOCTYPE html>
<html lang="en">
<head>
<meta charset="UTF-8">
<title>test</title>
<script type="text/javascript"
src="https://cdn.jsdelivr.net/vue/2.1.3/vue.js"></script>
<style>
</style>
</head>
<body>
<div id="app">
<p>{{message}}</p>
</div>
<script>
var app = new Vue({
el: '#app',
data: {
message : "xuxiao is boy"
},
beforeCreate: function () {
console.group('beforeCreate 创建前状态===============》');
//undefined
console.log("%c%s", "color:red" , "el : " + this.$el);
//undefined
console.log("%c%s", "color:red","data : " + this.$data);
console.log("%c%s", "color:red","message: " + this.message)
},
created: function () {
console.group('created 创建完毕状态===============》');
//undefined
console.log("%c%s", "color:red","el : " + this.$el);
//已被初始化
console.log("%c%s", "color:red","data : " + this.$data);
//已被初始化
console.log("%c%s", "color:red","message: " + this.message);
},
beforeMount: function () {
console.group('beforeMount 挂载前状态===============》');
//已被初始化
console.log("%c%s", "color:red","el : " + (this.$el));
console.log(this.$el);
//已被初始化
console.log("%c%s", "color:red","data : " + this.$data);
//已被初始化
console.log("%c%s", "color:red","message: " + this.message);
},
mounted: function () {
console.group('mounted 挂载结束状态===============》');
//已被初始化
console.log("%c%s", "color:red","el : " + this.$el);
console.log(this.$el);
//已被初始化
console.log("%c%s", "color:red","data : " + this.$data);
//已被初始化
console.log("%c%s", "color:red","message: " + this.message);
},
beforeUpdate: function () {
console.group('beforeUpdate 更新前状态===============》');
console.log("%c%s", "color:red","el : " + this.$el);
console.log(this.$el);
console.log("%c%s", "color:red","data : " + this.$data);
console.log("%c%s", "color:red","message: " + this.message);
},
updated: function () {
console.group('updated 更新完成状态===============》');
console.log("%c%s", "color:red","el : " + this.$el);
console.log(this.$el);
console.log("%c%s", "color:red","data : " + this.$data);
console.log("%c%s", "color:red","message: " + this.message);
},
beforeDestroy: function () {
console.group('beforeDestroy 销毁前状态===============》');
console.log("%c%s", "color:red","el : " + this.$el);
console.log(this.$el);
console.log("%c%s", "color:red","data : " + this.$data);
console.log("%c%s", "color:red","message: " + this.message);
},
destroyed: function () {
console.group('destroyed 销毁完成状态===============》');
console.log("%c%s", "color:red","el : " + this.$el);
console.log(this.$el);
console.log("%c%s", "color:red","data : " + this.$data);
console.log("%c%s", "color:red","message: " + this.message)
}
})
</script>
</body>
</html>
beforeCreate 和 created 钩子函数
在这个生命周期之间,进行初始化事件,进行数据的观测,可以看到在created的时候数据已经和data属性进行绑定(放在data中的属性当值发生改变的同时,视图也会改变)。
create 和 mounted 相关
咱们在chrome浏览器里打开,F12看console就能发现1
2
3
4
5
6
7beforecreated:el 和 data 并未初始化
created:完成了 data 数据的初始化,el没有
beforeMount:完成了 el 和 data 初始化
mounted :完成挂载
另外在标红处,我们能发现el还是 {{message}},
这里就是应用的 Virtual DOM(虚拟Dom)技术,先把坑占住了。
到后面mounted挂载的时候再把值渲染进去。

update 相关
这里我们在 chrome console里执行以下命令app.message= 'yes !! I do';
下面就能看到data里的值被修改后,将会触发update的操作。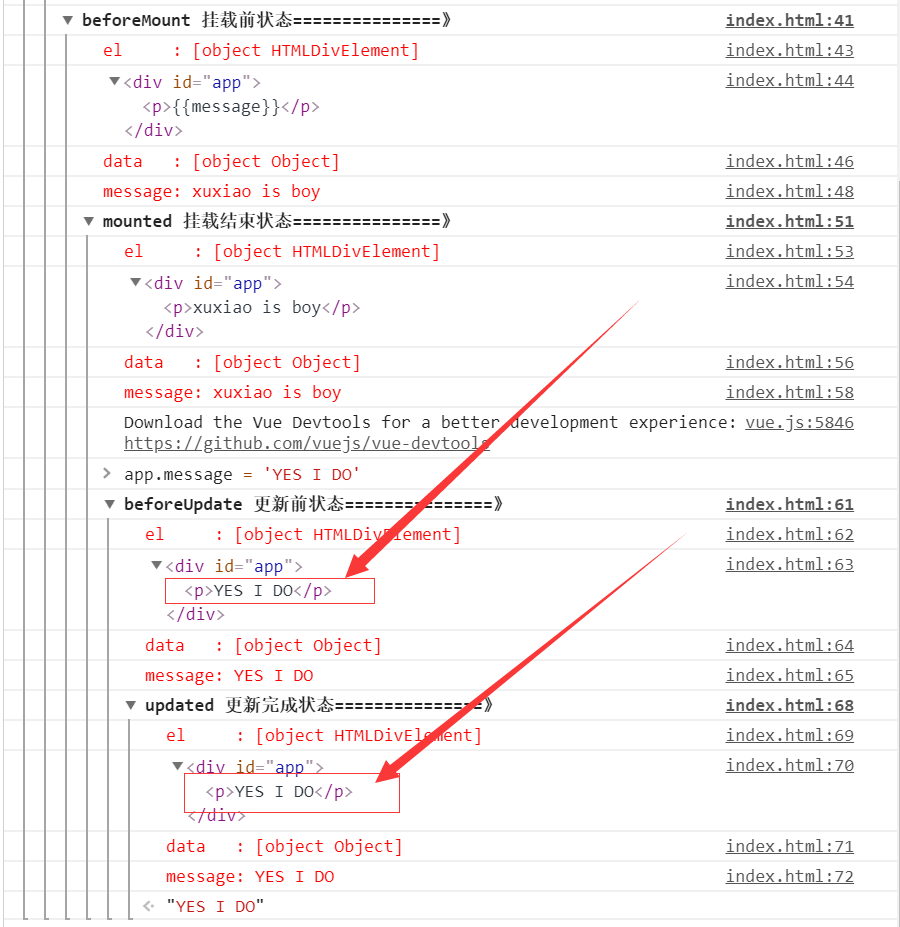
destroy 相关
有关于销毁,暂时还不是很清楚。我们在console里执行下命令对 vue实例进行销毁。销毁完成后,我们再重新改变message的值,vue不再对此动作进行响应了。但是原先生成的dom元素还存在,可以这么理解,执行了destroy操作,后续就不再受vue控制了。app.$destroy();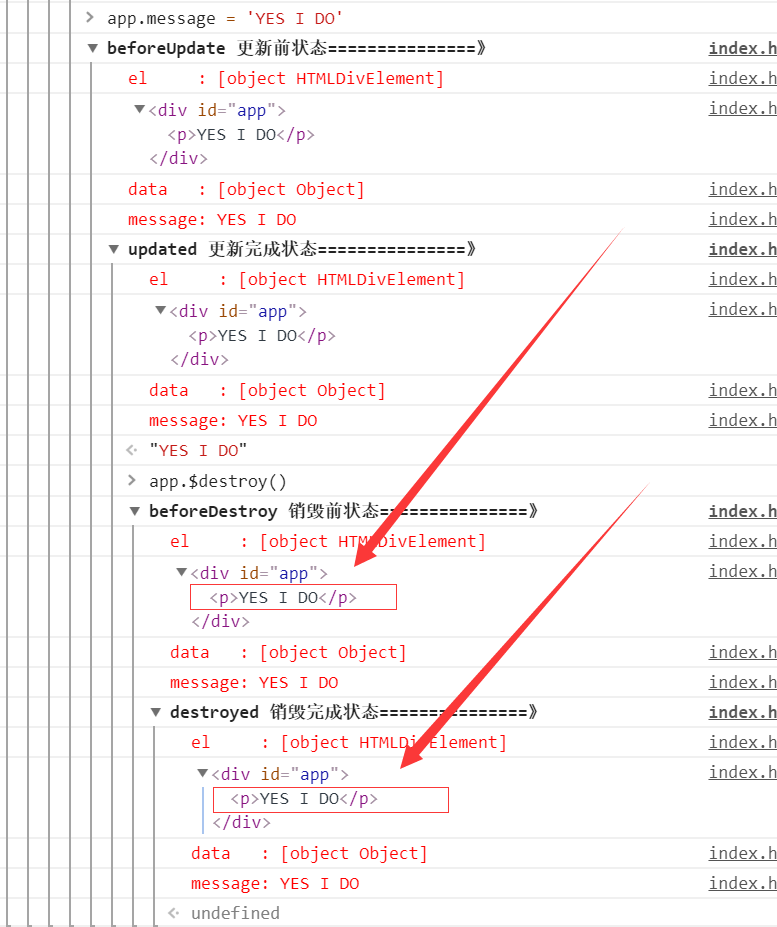
总结
1 | beforecreate : 举个栗子:可以在这加个loading事件 |
