
Vue组件间通信&传值
字数统计:3.8k字目录
- 通过路由带参数进行传值
- 通过设置 Session Storage缓存的形式进行传递
- 父子组件之间的传值
- 不同组件之间传值,通过eventBus(小项目少页面用eventBus,大项目多页面使用 vuex)
- Vuex进行传值
转载:
vue通信、传值的多种方式(详细)
Vue.js——十分钟入门Vuex
通过路由带参数进行传值
- 两个组件 A和B,A组件通过query把orderId传递给B组件(触发事件可以是点击事件、钩子函数等)
this.$router.push({ path: '/conponentsB', query: { orderId: 123 } }) // 跳转到B - 在B组件中获取A组件传递过来的参数
this.$route.query.orderId
通过设置 Session Storage缓存的形式进行传递
两个组件A和B,在A组件中设置缓存orderData
1
2
3
const orderData = { 'orderId': 123, 'price': 88 }
sessionStorage.setItem('缓存名称', JSON.stringify(orderData))B组件就可以获取在A中设置的缓存了
const dataB = JSON.parse(sessionStorage.getItem('缓存名称'))
此时 dataB 就是数据 orderData父子组件之间的传值
父组件往子组件传值props
①定义父组件,父组件传递 number这个数值给子组件,如果传递的参数很多,推荐使用json数组{}的形式
1
2
3
4
5
6
7
8
9
10
11
12
13
14
# parent.vue
<template>
<div class="parent"> # 例如:传递数组88给子组件
<children number=888></children>
</div>
</template>
import Children from 'components/children' # 引入子组件
export default {
components: {
Children
}
}
②定义子组件,子组件通过 props方法获取父组件传递过来的值。props中可以定义能接收的数据类型,如果不符合会报错。1
2
3
4
5
6
7
8
9
10
11
12
13# children.vue
<template>
<div class="children">
{{number}} # 显示父组件传递过来的值,显示88
</div>
</template>
export default {
props: { # 限制父组件传递过来的数据类型,如果不符合就报错
'number': [Number, String, Object],
'string': [String] #可以传递多个值,逗号隔开
}
}
当然也可以简单一点,如果不考虑数据类型,直接 props:["number","string"]就可以了,中括号包裹,多个值使用,分隔。
③假如接收的参数 是动态的,比如 input输入的内容 v-model的形式
注意:传递的参数名称 支持驼峰命名,下面示例描述不正确(1.0是不支持的)1
2
3
4
5
6
7
8
9
10
11
12
13
14# parent.vue
<template>
<div class="parent">
<input type="text" v-model="inputText">
<children :input-val = 'inputText'></children>
# 注意 :input-val 不支持驼峰命名,建议 - 分割
</div>
</template>
import Children from 'components/children'
export default {
components: {
Children
}
}
1 | <template> |
④父子组件传值,数据是异步请求,有可能数据渲染时报错
原因:异步请求时,数据还没有获取到但是此时已经渲染节点了
解决方案:可以在 父组件需要传递数据的节点加上v-if = false,异步请求获取数据后,v-if = true
子组件往父组件传值,通过emit事件
1 | # children.vue |
1 | # parent.vue |
不同组件之间传值,通过eventBus(小项目少页面用eventBus,大项目多页面使用 vuex)
①定义一个新的vue实例专门用于传递数据,并导出
就是定义一个公共的传值用的组件进行数据的交互1
2
3# 新建文佳eventBus.js
import Vue from 'vue'
export default new Vue()
②定义传递的方法名和传输内容,点击事件或钩子函数触发eventBus.emit事件1
2
3
4
5
6
7
8
9
10
11
12
13
14
15
16# componentA.vue
<template>
<div class="componentsA">
<button @click="emitToB">按钮点击传递数据给兄弟组件B</button>
</div>
</template>
<script>
import eventBus from 'common/js/eventBus.js'
export default {
methods: {
emitToB() {
eventBus.$emit('eventFromA', '我是组件A传递给组件B的数据')
}
}
}
</script>
③接收传递过来的数据
注意:enentBus是一个另一个新的Vue实例,区分两个this所代表得vue实例1
2
3
4
5
6
7
8
9
10
11
12
13
14
15
16
17
18
19
20
21
22
23
24
25
26
27
28
29
30componentB.vue
<template>
<div class="componentsB">
{{title}} # 显示传递过来的值
</div>
</template>
<script>
import eventBus from 'common/js/eventBus.js'
export default {
data() {
return {
title: ''
}
},
mounted() {
this.getEventData()
},
methods: {
getEventData() {
const that = this
#this是项目vue的实例,用that接收,与eventBus的vue区分
eventBus.$on('eventFormA', function(val) {
that.title = val
# this.title = val
# 这个this指的是eventBus的vue实例
})
}
}
}
</script>
Vuex进行传值
什么是Vuex
Vuex是一个专门为Vue.js应用程序开发的状态管理模式, 它采用集中式存储管理所有组件的公共状态, 并以相应的规则保证状态以一种可预测的方式发生变化.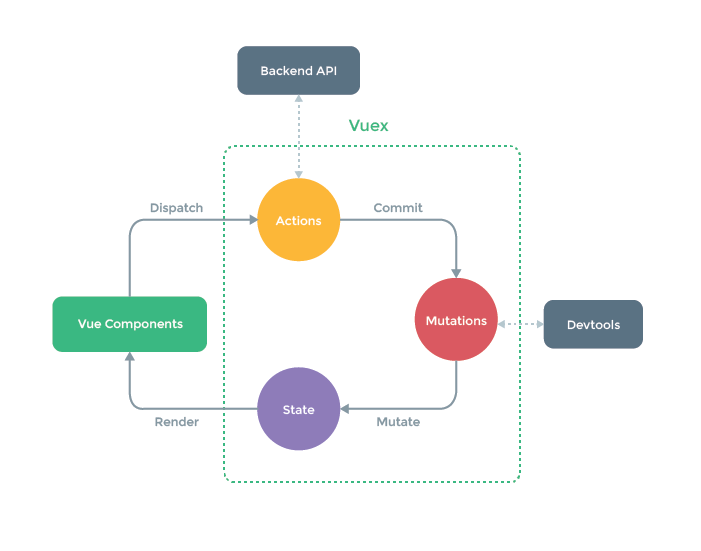
上图中绿色虚线包裹起来的部分就是Vuex的核心, state中保存的就是公共状态, 改变state的唯一方式就是通过mutations进行更改. 可能你现在看这张图有点不明白, 等经过本文的解释和案例演示, 再回来看这张图, 相信你会有更好的理解.
为什么要使用Vuex
试想这样的场景, 比如一个Vue的根实例下面有一个根组件名为App.vue, 它下面有两个子组件A.vue和B.vue, App.vue想要与A.vue或者B.vue通讯可以通过props传值的方式, 但是如果A.vue和B.vue之间的通讯就很麻烦了, 他们需要共有的父组件通过自定义事件进行实现, A组件想要和B组件通讯往往是这样的: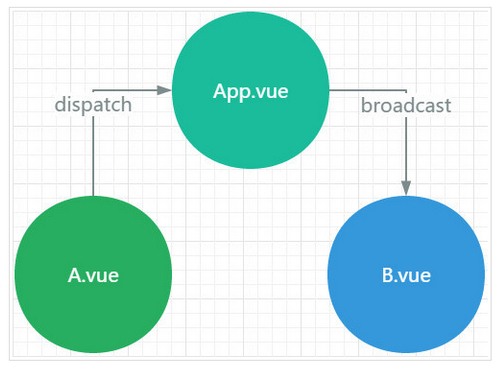
- A组件说: “报告老大, 能否帮我托个信给小弟B” => dispatch一个事件给App
- App老大说: “包在我身上, 它需要监听A组件的dispatch的时间, 同时需要broadcast一个事件给B组件”
- B小弟说: “信息已收到”, 它需要on监听App组件分发的事件
这只是一条通讯路径, 如果父组件下有多个子组件, 子组件之间通讯的路径就会变的很繁琐, 父组件需要监听大量的事件, 还需要负责分发给不同的子组件, 很显然这并不是我们想要的组件化的开发体验.
Vuex就是为了解决这一问题出现的
如何引入Vuex
下载vuex: npm install vuex --save
在main.js添加:1
2
3
4
5
6
7
8
9
10
11
12
13import Vuex from 'vuex'
# 使用vuex
Vue.use( Vuex );
const store = new Vuex.Store({
//待添加
})
new Vue({
el: '#app',
store,
render: h => h(App)
})
Vuex的核心概念
在介绍Vuex的核心概念之前, 我使用vue-cli初始化了一个demo, 准备以代码的形式来说明Vuex的核心概念,这个demo分别有两个组件ProductListOne.vue和ProductListTwo.vue, 在App.vue的datat中保存着共有的商品列表, 代码和初始化的效果如下图所示: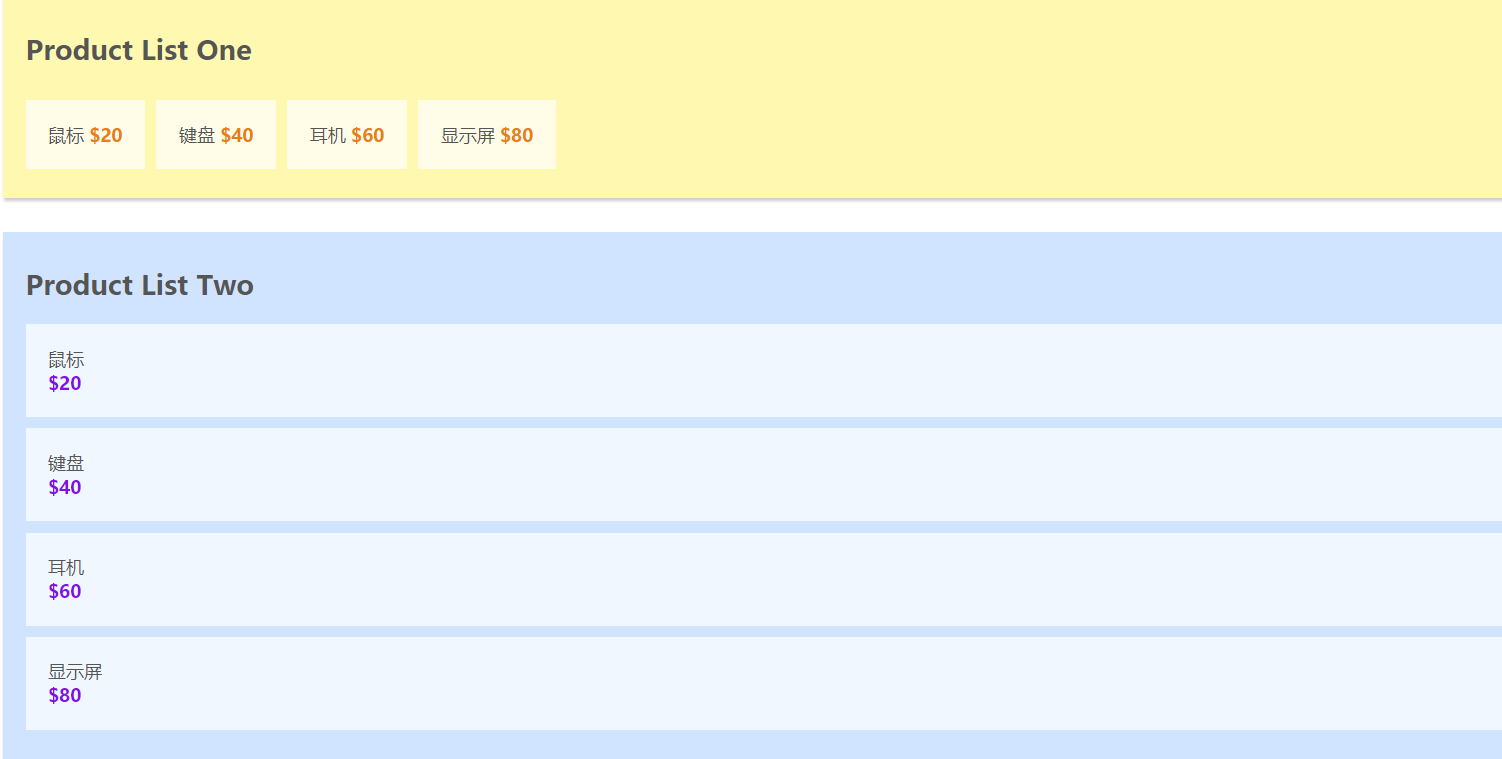
1
2
3
4
5
6
7
8
9
10
11
12
13
14
15
16
17
18
19
20
21
22
23
24
25
26
27
28
29
30
31
32
33
34
35
36
37
38//App.vue中的初始化代码
<template>
<div id="app">
<product-list-one v-bind:products="products"></product-list-one>
<product-list-two v-bind:products="products"></product-list-two>
</div>
</template>
<script>
import ProductListOne from './components/ProductListOne.vue'
import ProductListTwo from './components/ProductListTwo.vue'
export default {
name: 'app',
components: {
'product-list-one': ProductListOne,
'product-list-two': ProductListTwo
},
data () {
return {
products: [
{name: '鼠标', price: 20},
{name: '键盘', price: 40},
{name: '耳机', price: 60},
{name: '显示屏', price: 80}
]
}
}
}
</script>
<style>
body{
font-family: Ubuntu;
color: #555;
}
</style>
1 | //ProductListOne.vue |
1 | //ProductListTwo.vue |
State
state就是Vuex中的公共的状态, 我是将state看作是所有组件的data, 用于保存所有组件的公共数据.
- 此时我们就可以把App.vue中的两个组件共同使用的data抽离出来, 放到
state中,代码如下:1
2
3
4
5
6
7
8
9
10
11
12
13
14
15
16
17
18
19
20
21
22
23# main.js
import Vue from 'vue'
import App from './App.vue'
import Vuex from 'vuex'
Vue.use( Vuex )
const store = new Vuex.Store({
state:{
products: [
{name: '鼠标', price: 20},
{name: '键盘', price: 40},
{name: '耳机', price: 60},
{name: '显示屏', price: 80}
]
}
})
new Vue({
el: '#app',
store,
render: h => h(App)
})
此时,ProductListOne.vue和ProductListTwo.vue也需要做相应的更改1
2
3
4
5
6
7
8# ProductListOne.vue
export default {
data () {
return {
products : this.$store.state.products //获取store中state的数据
}
}
}
1 | # ProductListTwo.vue |
此时的页面如下图所示, 可以看到, 将公共数据抽离出来后, 页面没有发生变化.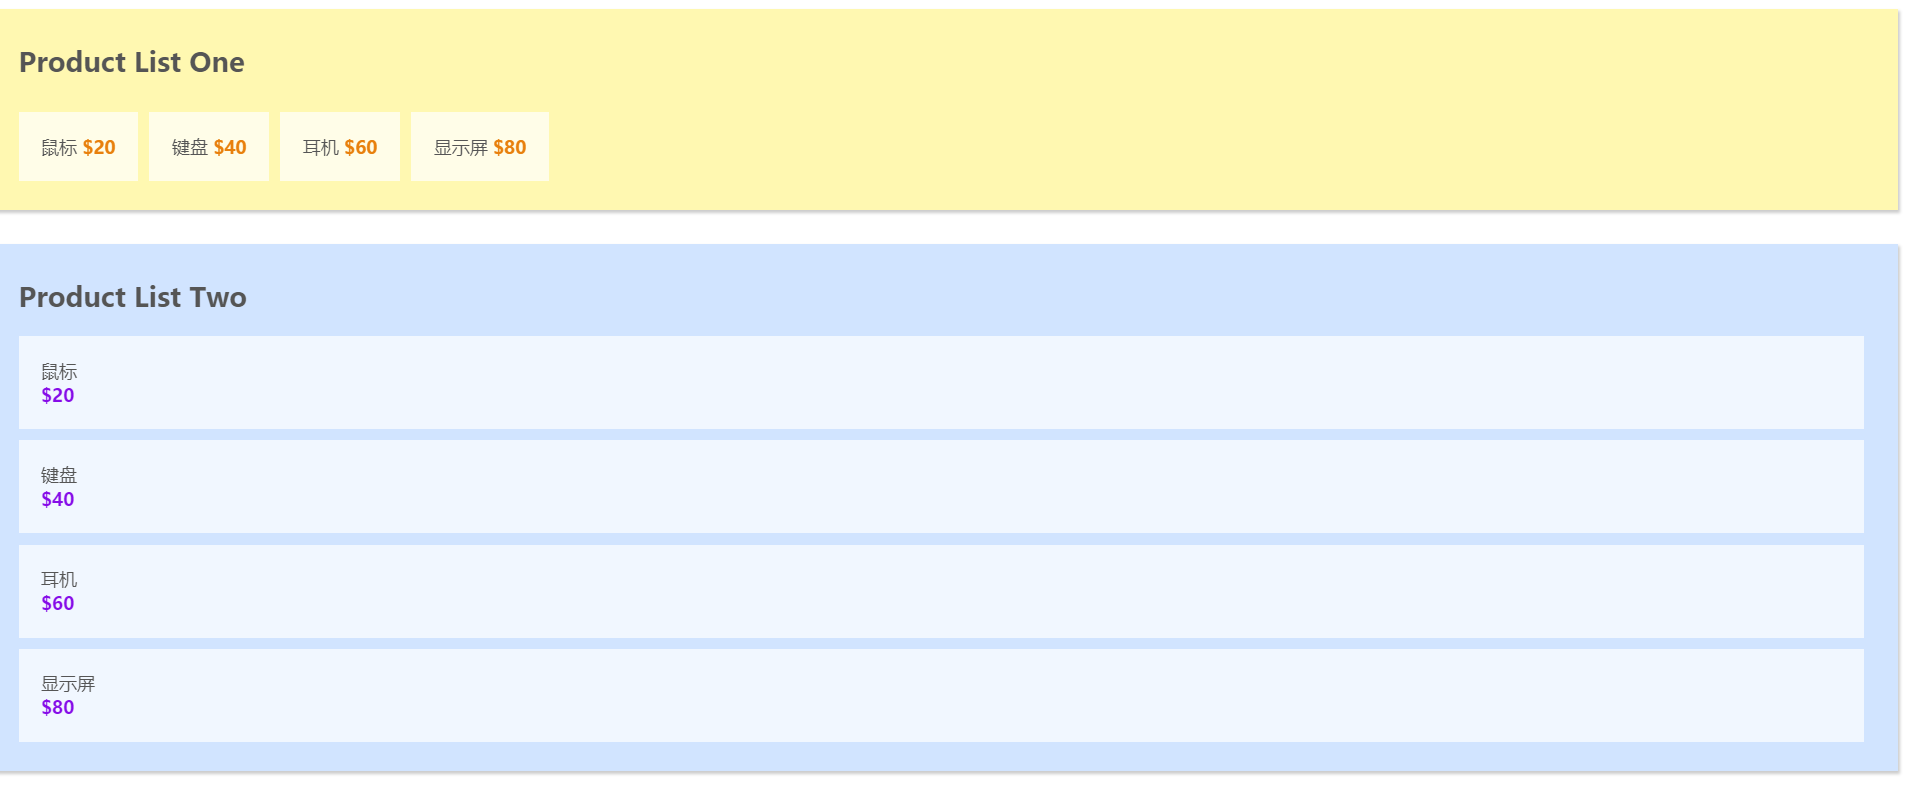
Getters
我将getters属性理解为所有组件的computed属性, 也就是计算属性. vuex的官方文档也是说到可以将getter理解为store的计算属性, getters的返回值会根据它的依赖被缓存起来,且只有当它的依赖值发生了改变才会被重新计算。
此时,我们可以在main.js中添加一个getters属性, 其中的saleProducts对象将state中的价格减少一半(除以2)1
2
3
4
5
6
7
8
9
10
11
12
13
14
15
16
17
18
19
20
21
22# main.js
const store = new Vuex.Store({
state:{
products: [
{name: '鼠标', price: 20},
{name: '键盘', price: 40},
{name: '耳机', price: 60},
{name: '显示屏', price: 80}
]
},
getters:{ //添加getters
saleProducts: (state) => {
let saleProducts = state.products.map( product => {
return {
name: product.name,
price: product.price / 2
}
})
return saleProducts;
}
}
})
将productListOne.vue中的products的值更换为this.$store.getters.saleProducts1
2
3
4
5
6
7export default {
data () {
return {
products : this.$store.getters.saleProducts
}
}
}
现在的页面中,Product List One中的每项商品的价格都减少了一半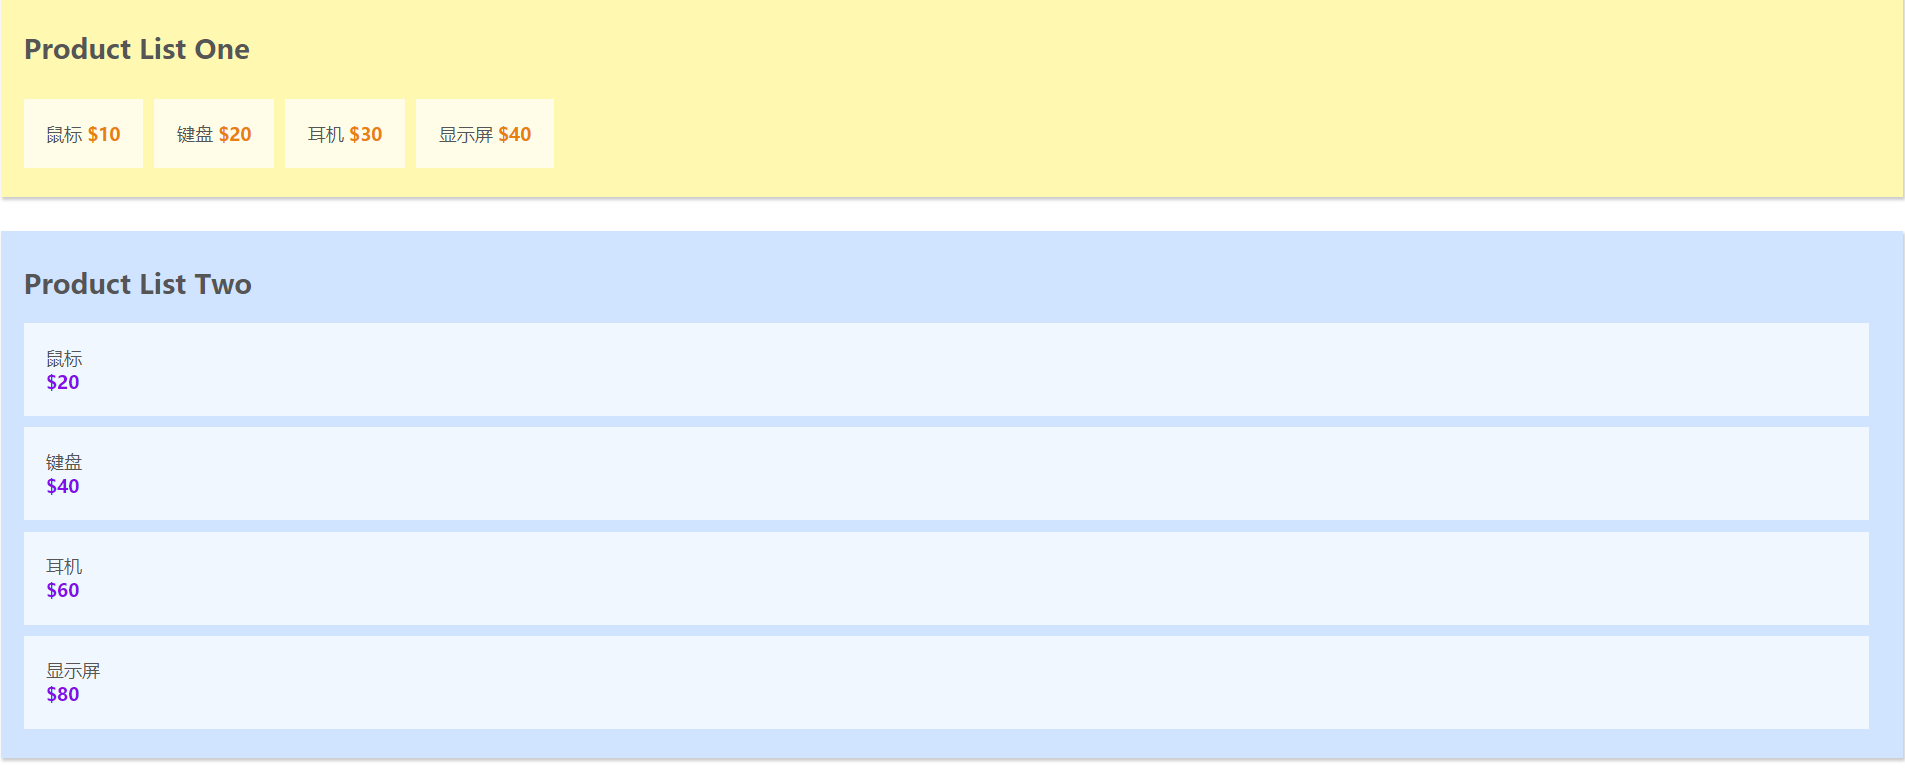
1 | ``` |
在ProductListTwo.vue中添加一个按钮,为其添加一个点击事件, 给点击事件触发minusPrice方法1
2
3
4
5
6
7
8
9
10
11
12
13# ProductListTwo.vue
<template>
<div id="product-list-two">
<h2>Product List Two</h2>
<ul>
<li v-for="product in products">
<span class="name">{{ product.name }}</span>
<span class="price">${{ product.price }}</span>
</li>
<button @click="minusPrice">减少价格</button> //添加按钮
</ul>
</div>
</template>
在ProductListTwo.vue中注册minusPrice方法, 在该方法中commitmutations中的minusPrice这个回调函数
注意:调用mutaions中回调函数, 只能使用store.commit(type, payload)1
2
3
4
5
6
7
8
9
10
11
12
13# ProductListTwo.vue
export default {
data () {
return {
products: this.$store.state.products
}
},
methods: {
minusPrice() {
this.$store.commit('minusPrice', 2); //提交`minusPrice,payload为2
}
}
}
添加按钮, 可以发现,Product List Two中的价格减少了2, 当然你可以自定义payload,以此自定义减少对应的价格.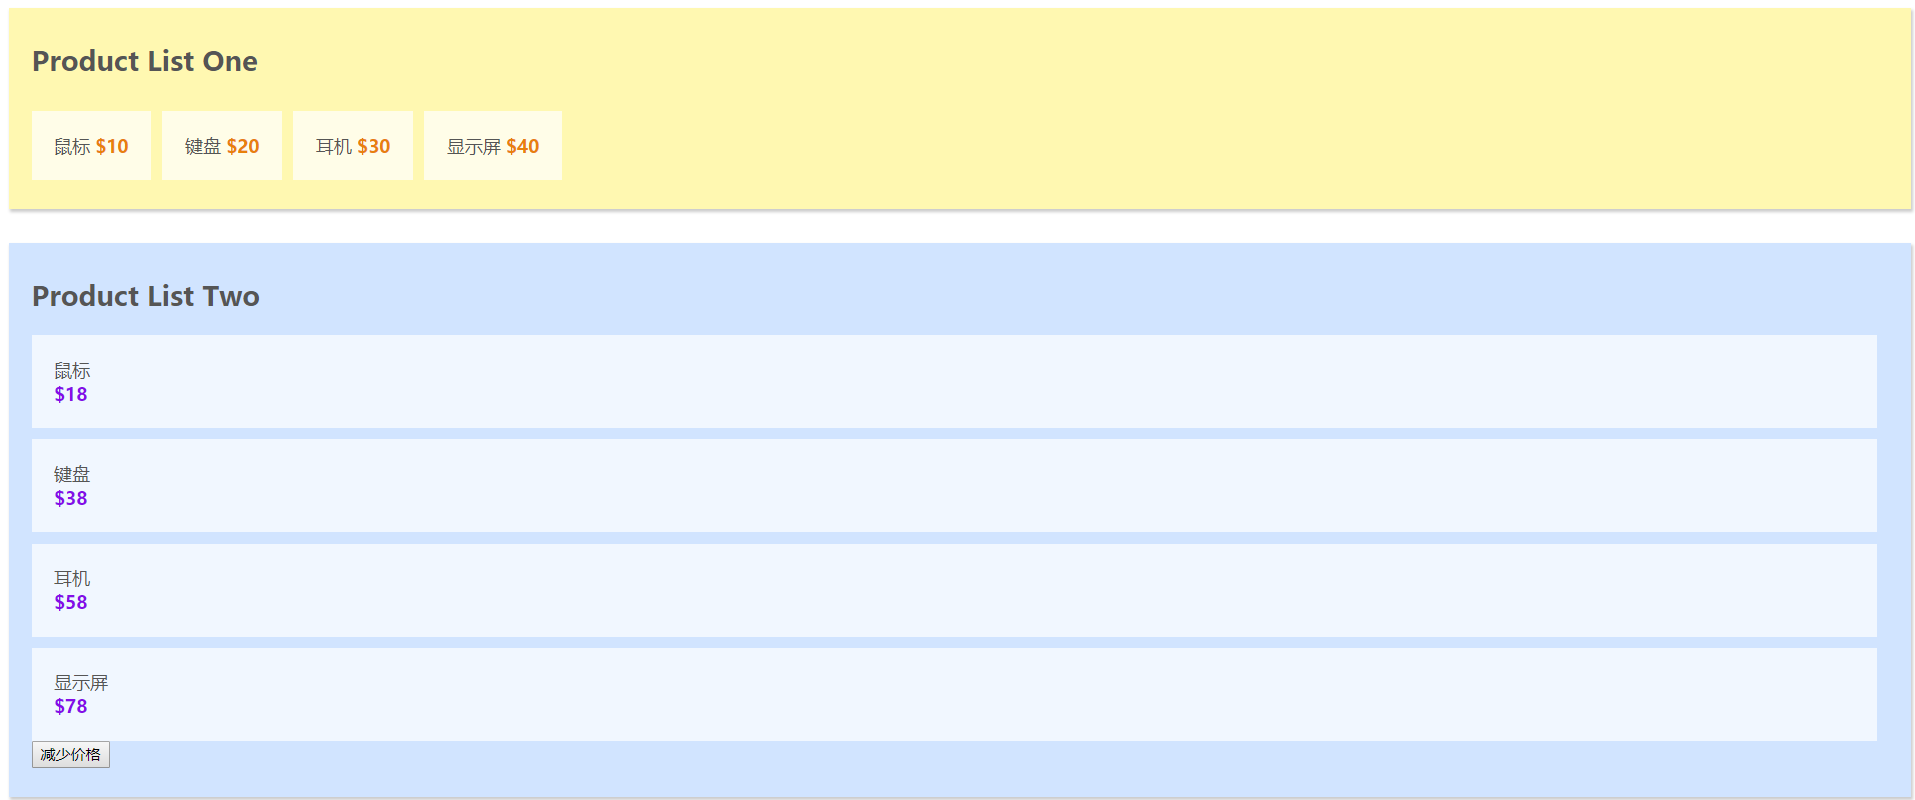
Actions
actions 类似于 mutations,不同在于:actions提交的是mutations而不是直接变更状态actions中可以包含异步操作, mutations中绝对不允许出现异步actions中的回调函数的第一个参数是context, 是一个与store实例具有相同属性和方法的对象
此时,我们在store中添加actions属性, 其中minusPriceAsync采用setTimeout来模拟异步操作,延迟2s执行 该方法用于异步改变我们刚才在mutaions中定义的minusPrice1
2
3
4
5
6
7
8
9
10
11
12
13
14
15
16
17
18
19
20
21
22
23
24
25
26
27
28
29
30
31
32
33
34
35
36//main.js
const store = new Vuex.Store({
state:{
products: [
{name: '鼠标', price: 20},
{name: '键盘', price: 40},
{name: '耳机', price: 60},
{name: '显示屏', price: 80}
]
},
getters:{
saleProducts: (state) => {
let saleProducts = state.products.map( product => {
return {
name: product.name,
price: product.price / 2
}
})
return saleProducts;
}
},
mutations:{
minusPrice (state, payload ) {
let newPrice = state.products.forEach( product => {
product.price -= payload
})
}
},
actions:{ //添加actions
minusPriceAsync( context, payload ) {
setTimeout( () => {
context.commit( 'minusPrice', payload ); //context提交
}, 2000)
}
}
})
在ProductListTwo.vue中添加一个按钮,为其添加一个点击事件, 给点击事件触发minusPriceAsync方法
1 | <template> |
在ProductListTwo.vue中注册minusPriceAsync方法, 在该方法中dispatchactions中的minusPriceAsync这个回调函数1
2
3
4
5
6
7
8
9
10
11
12
13
14
15export default {
data () {
return {
products: this.$store.state.products
}
},
methods: {
minusPrice() {
this.$store.commit('minusPrice', 2);
},
minusPriceAsync() {
this.$store.dispatch('minusPriceAsync', 5); //分发actions中的minusPriceAsync这个异步函数
}
}
}
添加按钮, 可以发现, Product List Two中的价格延迟2s后减少了5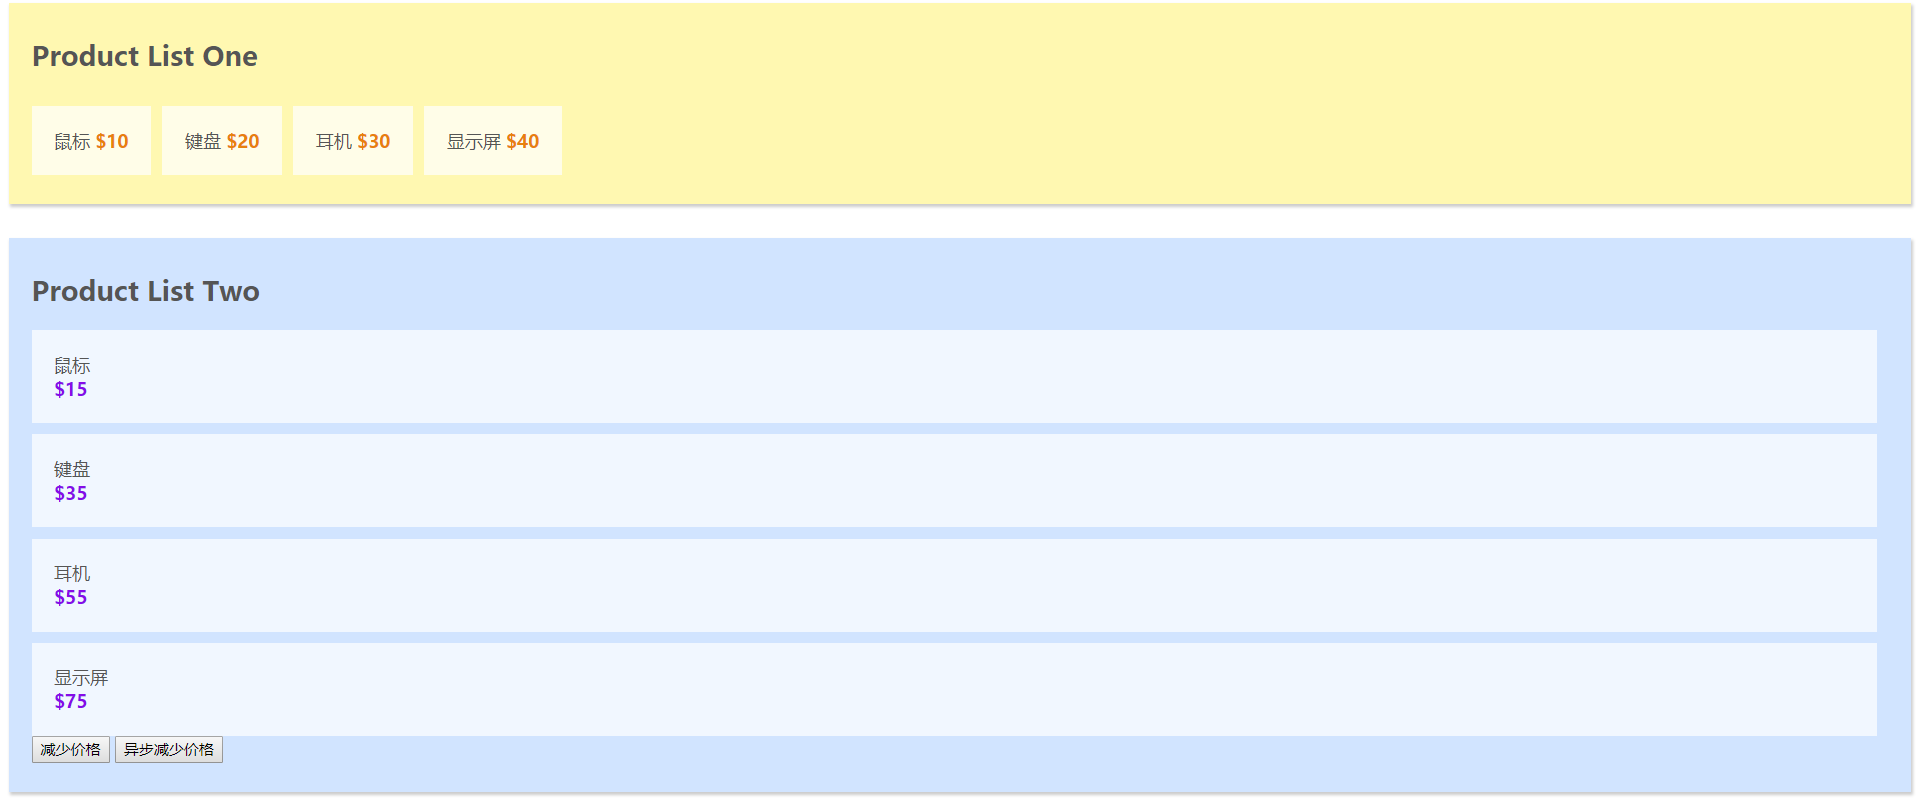
Modules
由于使用单一状态树,应用的所有状态会集中到一个比较大的对象。当应用变得非常复杂时,store 对象就有可能变得相当臃肿。为了解决以上问题,Vuex允许我们将 store 分割成模块(module)。每个模块拥有自己的 state、mutation、action、getter、甚至是嵌套子模块——从上至下进行同样方式的分割
1 | const moduleA = { |
